
图像的基本操作
2 Answers
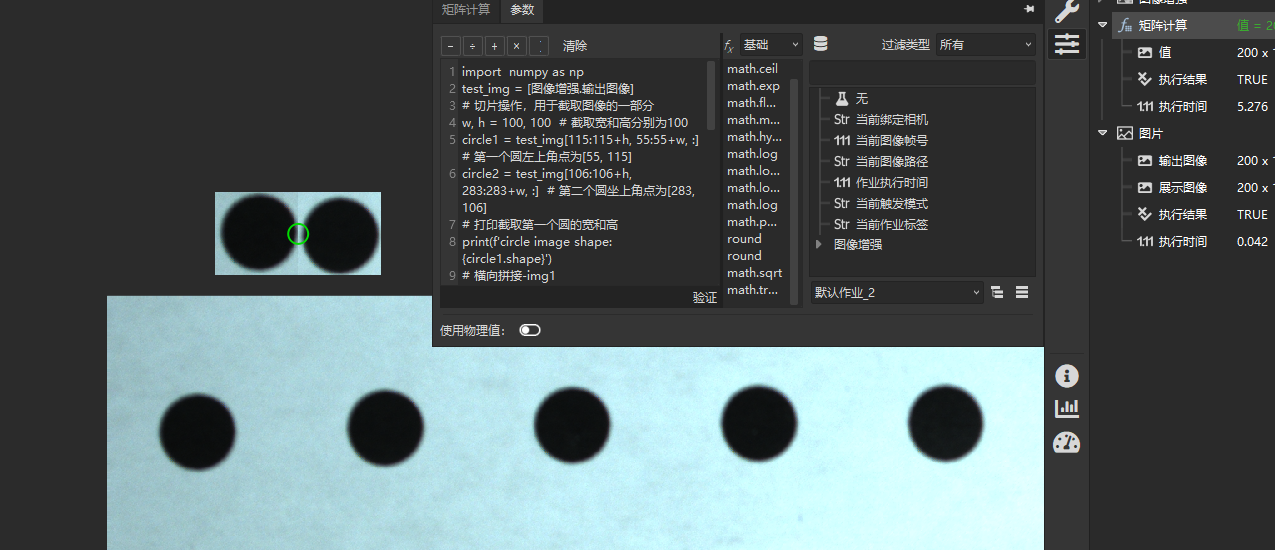
常见像素操作
import numpy as np
test_img = [图像增强.输出图像]
# 切片操作,用于截取图像的一部分
w, h = 100, 100 # 截取宽和高分别为100
circle1 = test_img[115:115+h, 55:55+w, :] # 第一个圆左上角点为[55, 115]
circle2 = test_img[106:106+h, 283:283+w, :] # 第二个圆坐上角点为[283, 106]
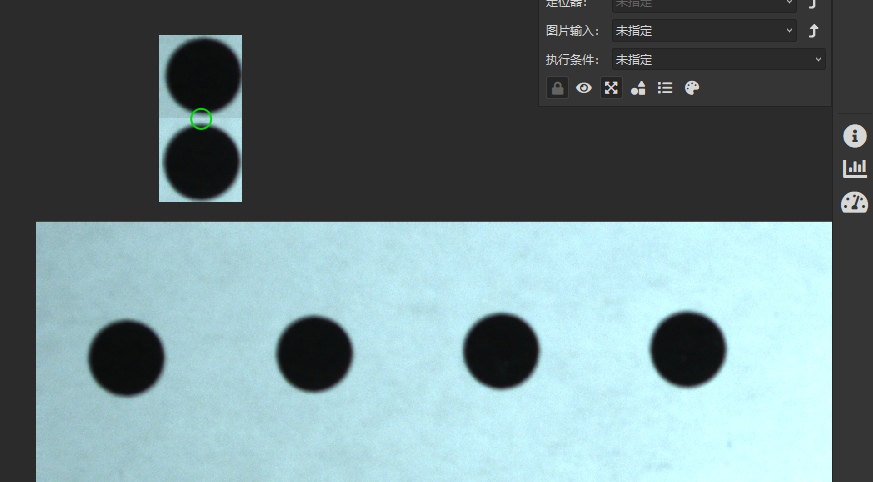
# 打印截取第一个圆的宽和高
print(f'circle image shape: {circle1.shape}')
# 横向拼接-img1
horizontal_stack_img = np.hstack((circle1, circle2))
# 纵向拼接-img2
vertical_stack_img = np.vstack((circle1, circle2))
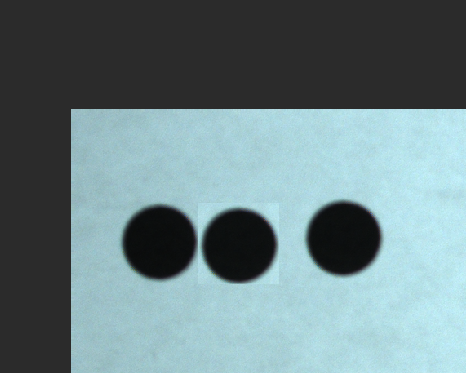
# 将拼接后的图粘贴覆盖到原图
# 计算目标区域:从第一个圆的左上角开始,宽度为两个圆的宽度之和
start_y = 115 # 第一个圆的y坐标
start_x = 55 # 第一个圆的x坐标
end_y = start_y + h
end_x = start_x + w * 2 # 两个圆的宽度
# 确保目标区域大小与拼接图像匹配-img3
test_img[start_y:end_y, start_x:end_x, :] = horizontal_stack_img
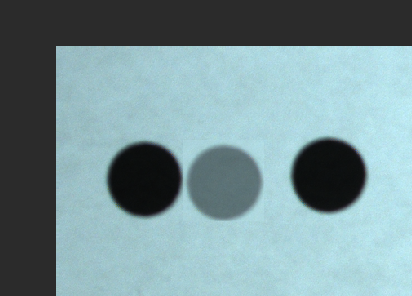
# 或者alpha blending将原有图像和粘贴图像混合-img4
raw_crop_img = test_img[start_y:end_y, start_x:end_x, :]
test_img[start_y:end_y, start_x:end_x, :] = (raw_crop_img*0.5 + horizontal_stack_img*0.5).astype(np.uint8)
Result = test_img
img-1
img-2
img-3
img-4
值得注意的是,有时候这种切片会出现如下情况,看起来像图像被撕碎了,此时需要使用np.ascontiguousarray(),因为切片后的图像在内存中有可能是不连续的,影响了图像切片在灵闪中的显示,通过ascontiguousarray可以转为连续内存。当然使用ascontiguousarray会有额外的拷贝,在高性能场景需要甄别使用。
在使用ascontiguousarray之后就会获得正常图像显示

补充几个numpy使用常见方法:
import numpy as np
数组创建:np.array, np.zeros, np.ones, np.arange, np.empty,np.random;
统计相关:np.sum, np.mean, np.min, np.max;
Related